School Garden Post 2: Let's Plant & Sprout!!
Hello kids! I hope you all have had a great week. How did those gardening journals come out and did you do any garden planning? If you did, feel free to share in the comments.
So for our second week of gardening activities I have a short video reviewing our basic planting skills. I also have written instructions on how to make a "Seed Sprouting Necklace!" So let's get our hands dirty!
If you have a place to plant, take a look at the planting demonstration video.
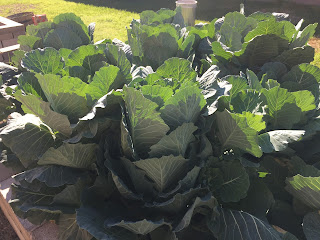
If you're planting in your garden, it should take only about a month for your plants to get to a nice size and fill up your garden space! Here's my spring garden 1 month ago and again today.
Materials: jewelry baggie, cotton ball, water, bean seed, yarn or string.
- Choose the type of beans you want to grow from dry beans in your pantry. You might choose a pinto, black, red, or lima bean. These are all good choices for this time of year.
- Moisten a cotton ball.
- Place the cotton ball inside the baggie.
- Place the bean inside the baggie in front of the cotton ball.
- Seal the baggie.
- Punch a hole in the baggie above the seal, using a hole puncher or pencil.
- Thread the string through the hole and cut it long enough to fit over your head when tied.
Now you have your Seed Sprouting Necklace!
- Wear it daily and watch your seed sprout!
- The heat from your body will provide warmth, but make sure to go out into the sun some too.
- Journal what happens to your seed each day in your journal.
- You may want to open it each evening to get a little air.
- After it sprouts a couple of leaves, plant it in a pot or in the garden!


Comments
Post a Comment